Cooking burgers on the stove is one of the fastest ways to get a deeply browned, juicy burger any time of year—and without firing up a grill. Most stovetop burgers take 5 to 10 minutes total, depending on thickness and how you like your meat cooked.
A standard 5-oz. beef patty usually needs about 5 minutes on the first side over medium-high heat. For a rare patty, simply flip the burger to seal the second side, then remove it from the heat. Otherwise, let the second side cook for 1 to 5 minutes, depending on how you like it.
Based on a 5-oz. patty cooked over medium-high heat:
The key is simply to use a hot pan, leave the burger undisturbed long enough to form a deep brown crust, and invest in an instant-read meat thermometer.
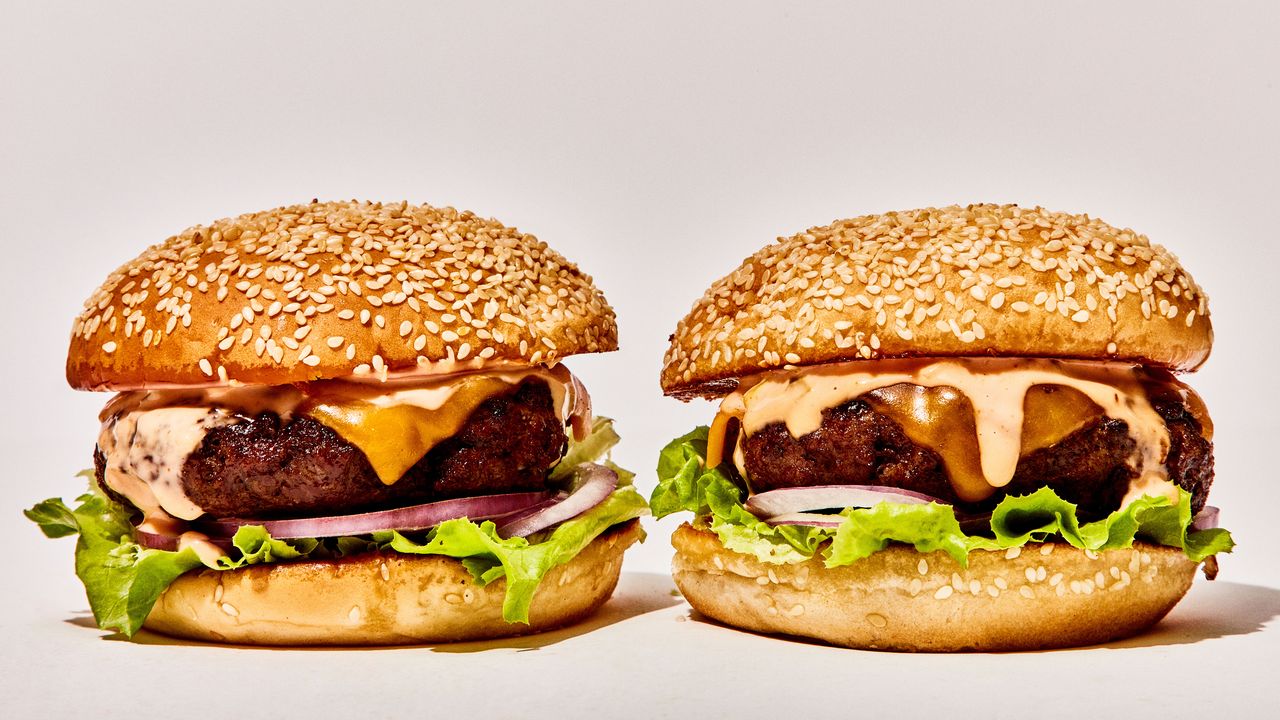
This basic burger recipe from former Bon Appétit editor Claire Saffitz is an evergreen favorite, full of smart techniques for molding a stellar homemade burger—juicy, flavorful beef that’s never dry or mealy. The cooking process is simple, and the results are magnificent. It comes down to that age-old harmony of timing, seasoning, and picking the right ingredients.
Looking for grilled burgers? Head this way →
How to cook burgers on a stove, step-by-step
- Choose your beef
Use 80/20 ground beef for the best balance of flavor and juiciness. For the best burger—one with real beefy flavor—fat is essential. Look for ground beef marked “80/20” (that’s 80% lean, 20% fat). If the meat is frozen, thaw it in the fridge for roughly 1 day per pound. - Shape the patties
Form 5-oz. patties slightly wider than your buns (the patties will shrink as they cook). Handle gently—overworking makes tough burgers. - Optionally, make a dimple
Unless you’re making thin smashburgers, create a depression (with your finger or spoon) at the center of each patty. The meat contracts as it heats up, causing it to puff up in the middle; when you see juices pooling in the depression, that’s your cue to flip. - Preheat your pan
Place a cast-iron or heavy stainless-steel skillet over medium-high heat until hot. (A bead of water dropped into the pan should hiss and dance a bit before evaporating.) - Season burgers just before cooking
Season both sides of the burger patty generously with kosher salt and black pepper right before sliding them into the pan. Salting too far in advance (or worse, mixing salt into the patties) will draw moisture to the surface, rendering the meat bouncy rather than unctuous. - Oil the pan
Use a neutral oil (such as vegetable, canola, or grapeseed oil) to prevent sticking and encourage browning. A tablespoon or two of oil should do the trick, just enough to leave a light layer on the base of the pan. For extra insurance, you can rub some oil right onto the patty as well. - Cook burgers
Place patties in the pan and do not move them. You need sustained, uninterrupted meat-to-heat contact to achieve maximum browning. Don’t press on the patty either; it will only squeeze out the fat, leaving you with a dry burger. Remember: An undisturbed patty is a happy patty. Cook about 5 minutes on the first side to develop a crust. - Flip once and add cheese (if using)
Cook 1 to 5 minutes on the second side, depending on doneness (see above). If you’re making cheeseburgers, now’s the time to lay that cheese on top. Cover the pan briefly (about 30 seconds), so the trapped steam melts the cheese. - Let the burgers rest
The burgers need time for their juices to settle. After removing them from the heat, let them rest 3 to 5 minutes (uncovered) before assembling. Use the time to: - Gather your toppings and toast your buns
Use the hot pan and burger fat to toast your hamburger buns. They’ll only need 30 seconds to 1 minute, so keep a close eye on them. This is also the perfect time to stir up a bowl of burger sauce (a mix of mayo, ketchup, hot sauce, and pickle juice). But how you curate your burger is entirely up to you. Prep some crisp iceberg lettuce, sliced red onion, beefsteak tomatoes, and whatever else says “perfect burger” to you.
Because they are thinner, smashburgers develop a crust and cook much more quickly.
- Form 4-oz. beef balls (not patties) and keep them chilled.
- Press firmly into a very hot skillet, using one spatula to flatten them and a second spatula to press down on the first.
- Cook ~2 minutes on the first side.
- Flip, add cheese if desired, and cook ~1 minute on the second side. If the cheese needs help melting, cover the pan briefly.

With crisp edges and a juicy bite, this may be the ultimate burger.
Poultry and plant-based burgers
With chicken and turkey burgers, cooking the meat all the way through—165°F, per the USDA—is key, so the patties may take slightly longer to cook than a beef burger.

Turkey burgers always sound like a great idea, but they too often taste like a fat sawdust patty. No more, friends! Mashing avocado into the turkey mixture helps prevent the meat from shrinking and drying out during cooking, which is why these stay awesomely juicy, even when they’re cooked all the way through.

Consider these chicken tikka kebab–inspired burgers oozing with cheese the only burger you’ll want to enjoy all summer.
The world of veggie and alternative meat burgers is vast, and cook time can vary widely depending on ingredients and patty thickness. If the recipe involves raw eggs, be sure to cook the patty all the way through. For an Impossible Burger, aim for 2 to 3 minutes a side.

Everyone questioned why the world needed another veggie burger recipe until they saw how easy and Monday-nightable this one is.
We are unabashed American cheese evangelists here at Bon Appétit. Simply, no other cheese does what it does: It melts like there’s no tomorrow thanks to an emulsifying agent. It’s mild and creamy, complementing the beef’s flavor without competing with it. “The whole point of American cheese is that it’s un-substitutable, an anomaly in the cheese world,” senior Test Kitchen editor Shilpa Uskokovic writes in her ode above. Take her word for it.

And yes, it is real cheese.
That said, any cheese that melts can work. Mild, younger cheeses turn gooier than aged ones, so save the sharp cheddar for snacking. Swiss, Muenster, and Gouda are all great contenders.
Choosing the right burger bun
A potato roll has become the default of many burger joints, and we won’t argue. They’re plush and pillowy and able to soak in all those burger juices without disintegrating.
Other great choices include buttery brioche rolls and sweet Hawaiian-style buns. Whatever you do, a toasted bun is the only way to go for a truly great burger. Give the cut sides of the hamburger bun a good swipe of mayo before toasting. The combo of oil and egg in the mayo promotes that golden griddled browning you’re after.
And then, of course, you could make your own bun.

Make these sesame buns today, then question why it took you so long to make your own buns for burgers, egg sandwiches, fried chicken, and fillets o’ fish. This recipe from bread master Bryan Ford is based on his Master Dough recipe; simply portion it out, roll into tight balls, then dip in sesame seeds (or any small seeds and seasonings of your choice—poppy, flax, dried onion…). Ford bakes his buns in muffin rings, which gives them dramatic height—but free-form works just as well.
Working with ground meat requires extra vigilance—more than with other cuts. According to the USDA, bacteria on meat can double in just 20 minutes when in the “Danger Zone” (between 40℉ and 140℉).
With this in mind, don’t leave meat out of refrigeration for more than 2 hours, and don’t leave it at temperatures of 90°F or higher for more than an hour. Store it in the refrigerator, ideally in the dedicated meat drawer or on the lowest shelf, to minimize contamination from drips. If frozen, thaw it in the fridge for roughly one day per pound of ground meat.
- Can you cook burgers on the stove without a cast-iron skillet?
Yes, a stainless-steel or carbon-steel skillet, or a griddle, works. The key is a heavy bottom that evenly distributes heat. No matter which cooking vessel you use, preheat it before adding the patties. - Should you cover burgers while cooking on the stove?
Only at the end to melt the cheese. Covering earlier traps steam and prevents browning. - Do you flip burgers more than once?
No. From start to finish, you want to fuss with the beef as little as possible. Overmixing can make it tough, and flipping it more than once will prevent a proper crust from forming. - How do I know when burgers are done without a thermometer?
Use timing and adjust for thickness: - 6 minutes = medium-rare
- 7–8 minutes = medium
- 9–10 minutes = well-done
- Why are my stovetop burgers dry?
Usually, it’s from overcooking, using lean beef, or pressing the patty while it cooks.
Order up:

It’s all about that special sauce.


Leave a Reply